Thanksgiving without turkey stress — it’s a good thing.
In a Facebook discussion about my last post, a friend asked how it is possible for my mom to make the turkey and me to make the gravy at two separate houses. It was revealed that I actually make the gravy at their house before our shared Thanksgiving meal but that Mom makes the turkey ahead of time. Stop the presses! Thanksgiving turkey cooked before the big day? How is it done?
Well, it’s really no big deal. Several years ago, we had a bit of a turkey fiasco on Thanksgiving when Mom and Dad’s oven partly quit — it felt hot when we opened the door to check that turkey 18,000 times, but it wasn’t finishing the silly thing. After delaying the meal for awhile, we finally hacked Mr. Tom into pieces and microwaved him — a rather unsatisfying ending to his short life and a rather unsatisfying result on our plates, too. While we worked, we talked about how it was too bad we couldn’t have made the turkey the day before and realized the oven wasn’t working. (Thankfully, my parents have another oven that had been faithfully baking the sides all morning.) “Why couldn’t we do that next year?” we thought. Our reasoning went like this:
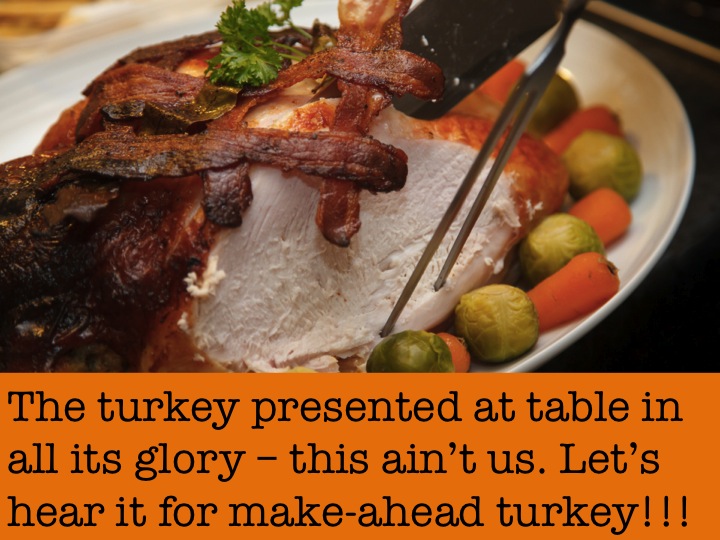
- We never present the whole bird in all his golden glory at the table anyway — we always carve him in the kitchen and bring out the meat on a platter.
- We always have plenty of leftover turkey and never mind eating the reheated leftovers the next day, so why not reheat the turkey for the big Thanksgiving meal?
- And think of the other benefits — the ones besides finding out in advance that one’s oven is kaput:
- A free oven on Tday for baking sweet potato casserole, stuffing, green bean casserole, and so on!
- No turkey-carving-what-exploded-in-here mess in the kitchen on the big day! Just think of that for a minute. This is huge!!!
- Make-ahead turkey = easier gravy: Just pour off and strain the drippings. Once chilled, the risen-to-the-top solid fat is easy to lift off.
Mom and I did this the very next year and we have NEVER looked back. Now, our entire Thanksgiving menu is prepped before the big day except for two items — Mom’s dumplings and my gravy — and if we were eating at my house the gravy would be mostly made ahead as well. If I wanted to, I could drive over to Mom’s and get the drippings ahead of time and do the gravy at my house, but that’s more effort than just taking 15 minutes to make it on the day. With everything else prepped and only the baking of side dishes to be done, Thanksgiving morning is a breeze.
Here’s the how-to:
- One or two days before Thanksgiving, cook your turkey with whatever method you prefer — open-roasted, covered-roasted, grilled, stewed, oven bag — whatever. I don’t think deep-fried would work as well made-ahead, however. We roast ours breast-side-down, uncovered because he’s so very big. When I’ve made a smaller version, I often cook him in a covered pot or enameled roaster.
- Remove Mr. Tom to a big cutting board — now’s the time to use the one with grooves cut into it to catch drippings, if you have one.
- If your roasting pan is stovetop-proof, Put it over two burners turned to medium, add a cup of water, and bring to a simmer. Scrape up the delicious fond stuck to the bottom of the roaster. (If you can’t do that, don’t worry — just scrape up what you can and continue.) Pour off and strain the turkey drippings into a container. Chill that in the fridge. (This step is only if you roasted the bird, natch.) Save all the strained bits.
- When the meat is rested and cool enough to handle, carve it and wrap well in foil. You can even arrange it right on an oven-proof serving platter and wrap that in foil. Alternatively, I just read somewhere, and can’t for the life of me remember where, that somebody puts a layer of gravy on the platter under the arranged turkey to act as insurance against drying out during reheating. We haven’t felt like our turkey is dry, but that’s an interesting idea. Just seal it up tight and refrigerate immediately.
- Now for the fun part. (Kidding — I don’t like this part, but it is beyond terrific to get it out of the way long before the meal and not have to face it when I am stuffed full of stuffing afterward.): Pick that bird! Pull every little bit of extra meat you can off the carcass. Bag it up and refrigerate it to use within a few days, or label and freeze it as a treasure up your sleeve for another time. Save the skin and extra bits that reveal themselves to not be meat.
- At this point, you are looking at a rather naked skeleton. Into the trash? Au contraire, Pierre! It’s time to make stock! Or not, if you don’t want to. You can either freeze the bones and skin until you have time to deal with them after the holiday, or even throw it all away, although I would shed a little tear if I was there with you because stock is dead easy to make and can simmer away while you prep your made-ahead side dishes. Your call, though. If you want to make stock (I’m so proud of you!), put the bones and skin and strained roasting pan bits into your biggest pot. If necessary, use the heel of a heavy chef’s knife or even a washed hammer to break up the skeleton to make it fit down in there properly. Cover everything with cold water and bring it to a boil on the stovetop. A grey scummy foam will form on the surface. Use a spoon to scoop that off and throw it away. Turn the heat down so the liquid just simmers — just a bubble or two or three at a time is breaking the surface — and THAT’S IT. Walk away and go on about your life for anywhere from two hours to overnight. If the heat is set low enough it won’t boil dry because you aren’t boiling it. If you want to, you can add a couple of tablespoons of vinegar to the water to help leach minerals from the bones and into the broth, which many people think is very healthful. I do that if I think of it. You can also add onion skins and root ends, celery bits, carrot, a bouquet garni, and so on. When I was newer to stock-making I used to do that and felt very French and homemaker-extraordinaire-ish and everything, but now I make stock almost weekly (usually with rotisserie-chicken-from-Sam’s-Club leftovers) and it’s just water and a splash of vinegar.
- On Thanksgiving Day, remove the meat from the fridge a little more than an hour before service. Thirty minutes later, pop it in a 350-400 degree oven (offering a range because I know you have other dishes baking or heating in there, too) for about thirty minutes until it is hot. It doesn’t have to be screaming hot, you know, because most people are going to blanket it with hot gravy or eat it with bites of hot dressing and sweet potatoes. If you are really worried about it being too dry because maybe you overcooked it just a little the day before, then spoon a little water or stock over the meat before you heat it. Don’t drown it, however.
Now, do you want gravy to go with your turkey? You can handle that a couple of ways:
- To make it completely ahead (amounts below are for 1 quart of gravy):
- Remove the hardened layer of fat from chilled turkey drippings and set aside. Melt the congealed fat-free drippings in a saucepan or in the microwave until they are hot.
- Melt 1/2 c. of the fat from the top of the turkey drippings in a 2 quart saucepan over medium heat.
- Stir in 1/2 c. all-purpose flour (or gluten-free flour if you are entertaining any GF diners).
- Stir, stir, stir until you have a smooth mass. Keep stirring and cooking for about two minutes. This will prevent your gravy from having a raw flour taste.
- Leave your roux for just a moment (That’s the fancy French name for a flour/fat mixture cooked together when making a sauce or gravy.) to measure 4 cups of the hot drippings. If you don’t have enough to make that amount, add hot water to equal 4 cups. If you brined your bird, you may want to use half drippings and half water to prevent gravy that is too salty.
- Add the hot drippings to the roux, whisking or stirring all the while. Because the drippings are hot, the mixture will thicken almost immediately. If you see a few lumps, no fear. Just keep whisking and it will smooth out. You can do this!
- Taste the gravy to see if it needs seasoning. I don’t season mine until now because there are factors that affect the amount it needs — whether the turkey was brined or rubbed with seasoning before cooking matters a lot! Add salt and pepper as desired.
- Pour the gravy into a storage container, cover, and chill until shortly before serving time.
- To reheat, dump the gravy into a saucepan and heat over low heat, covered, stirring occasionally. You may need to add a little water to get it to the right consistency. Taste it for seasoning again when it is hot throughout. Adjust as needed and serve.
- To make the gravy shortly before serving, just omit steps 8 and 9. It takes about 15 minutes to make the gravy, so factor that into your Thanksgiving Day timetable. You can make it about 30 minutes early and let it sit in the pot, covered, off heat. Five minutes before service, put it back over low heat and let it heat up a little more. Whisk it again, pour it into your serving container (We use a 1 quart ceramic pitcher instead of a gravy boat because we are feeding a crowd.), and take it to the table.
There you go — make-ahead turkey and gravy.
How do you fix turkey for Thanksgiving? Or, do you fix turkey at all? Maybe you have a different main dish tradition — please share in the comments! And, I pray for all of us a happy and blessed Thanksgiving week. For more about making Thanksgiving Day easier, look here.
 Follow

11 Comments