Winter is here by the feeling outside, if not quite yet by the calendar. I don’t get very excited by winter weather, but I do get excited by much of the food of the season, especially butternut squash. Some people are intimidated by that tough skin and the pulpy seed cavity and, I don’t know, just the wouldn’t-broccoli-be-easier-ness of the winter squashes. I understand. I used to feel that way, too, but then I discovered a simple way to peel these babies and fell in love with the creamy texture and nutty, deep flavor and before I knew it butternut squash became my favorite winter vegetable. Here is a photo tutorial to comfort you if you want to foray into the world of winter squash, because if I can do it you gotta know you can, too.
Today, we are preparing our butternut squash two ways: roasted and as a gratin. Which is my favorite? Oh, I could no more choose between these than I could choose between my children. Well, probably I could, because as much as I love squash I value my children much, much more, so just ignore that, ok?
 |
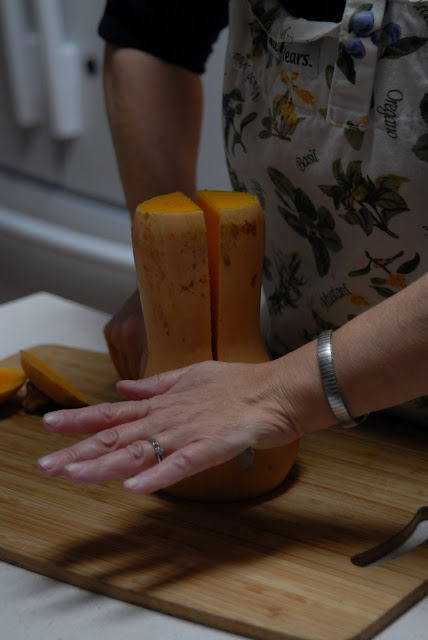
| To prepare the squash for either recipe, cut the ends away from the squash, stand it on end, and slice it in half lengthwise. |
 |
| It takes a little oomph. Use a heavy, sharp knife. You may need to rock it back and forth as you push down. Just think — this effort means you can have another two spoonsful of gratin! |
 |
| Now, get a regular teaspoon from your silverware drawer and use it to remove the seeds and stringy membranes from the cavity. I sort of slice all around the cavity with the edge of my spoon… |
 |
| …and scoop underneath, scraping as necessary, to get it all out. Discard this stuff. Yes, you could probably roast the seeds like pumpkin seeds, but this isn’t Martha Stewart and we don’t have time today. |
 |
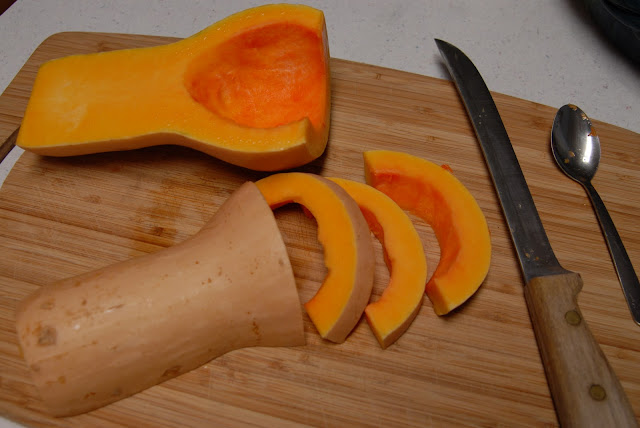
| Flip each half over cut-side-down and cut crosswise into 1/2″ thick slices. |
Now you have to choose which recipe you will make. Are you roasting or gratineeing?
First, the simplest — roasted squash:
 |
| Spread the squash in a single layer on a shallow-sided baking sheet. This is a half-sheet pan. I line it with foil because I hate to scrub pans. Lined or not, spray the surface with cooking spray. Drizzle the slices with a couple of tablespoons of oil — olive or canola — and smear it over the cut surfaces with your clean fingers. See me adding salt? Sprinkle from on high for the most even coverage. Why? It has something to do with physics or magic or one of those sciences, I think. |
 |
| Add the pepper — get those arms UP! Do not be confused by the cream and shredded cheese in the photo — we are currently preparing roasted squash, which uses neither of these ingredients. But in real life I was making both roasted and gratineed squash at the same time, among other dishes, so you see lots of ingredients lying around. You may not be ready for such culinary mayhem — it can take YEARS before one is able to handle more than one item at a time — so don’t let my obviously superior skills make you feel bad about yourself. Cough. Would you believe me if I told you that while I was cooking all this stuff, our daughter was making cake pops at the other end of our island? She was. |
 |
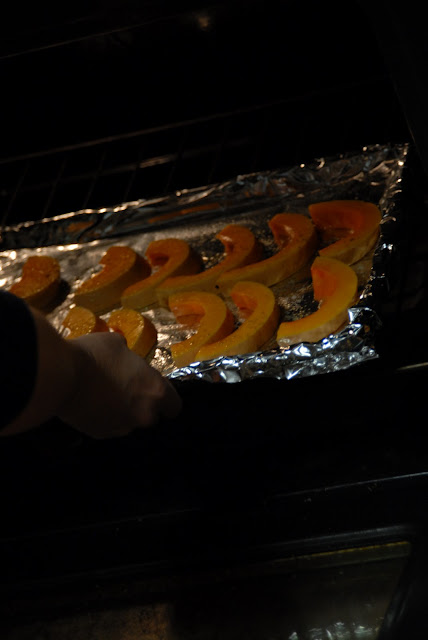
| Slide the pan into a preheated 450 degree oven, center rack, for about 15 minutes. |
 |
| Poke a slice with a fork to check for tenderness. Eat right away (the flesh will separate easily from the peel) or let the slices cool. Then you can peel and dice them and use them in all kinds of ways — as a stir-in for risotto or a wonderful salad or to toss with pasta or probably a dozen other applications. Another kitchen asset is born! |
Roasted Butternut Squash
Serves 4-6
1 medium butternut squash
2 T. oil
salt and pepper to taste
1. Preheat oven to 450 degrees. Place rack in lowest position.
2. To prepare the squash, cut the ends away from the squash, stand it on end, and slice it in half lengthwise with a large, sharp knife. Remove the seeds and stringy membranes from the cavity with an ordinary teaspoon. Flip each half over cut-side-down and cut crosswise into 1/2″ thick slices.
3. Spread the squash in a single layer on a greased, optionally foil-lined, shallow-sided baking sheet. Drizzle the slices with a couple of tablespoons of oil — olive or canola — and smear it over the cut surfaces with clean fingers. Season to taste with salt and pepper.
4. Roast for about 15 minutes or until tender and lightly browned on the bottom. You can flip them halfway through the cooking, but I rarely do.
Notes: This is such a flexible recipe. Use a lower temperature and longer time if you have something else that needs to share the oven. Drizzle the squash with honey or maple syrup for a sweet result. You can add a pinch or two of dried herbs like thyme or rosemary, if you like. You can peel and/or cube the slices before roasting.
And then the uses for the resulting wonderfulness! Risotto, salads, pasta add-in, mashed and stuffed into ravioli – life is good with a bowl of roasted squash in the refrigerator.
Now, onto Butternut Squash au Gratin, which is the choice you ought to make when you find yourself in possession of some heavy cream begging to be used:
 |
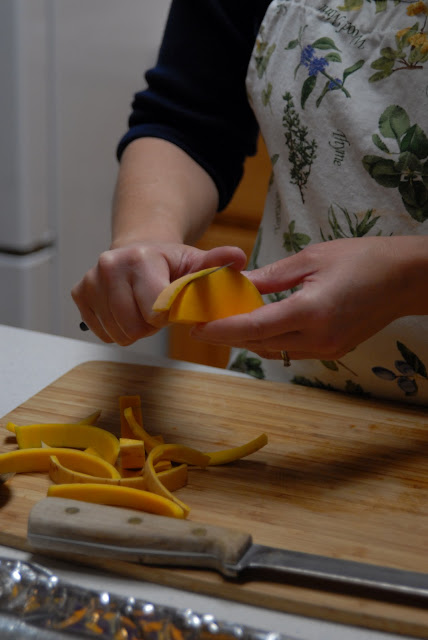
| Back up to your pile of raw, sliced squash above. Now we’re going to peel them the Lori’s Lazy, Save-Your-Joints Way. (Have you ever tried to peel a whole butternut squash with a swivel vegetable peeler like some recipes tell you to do? Are those authors crazy? Masochists? This is much, much simpler. Just remove the strip of peel from each slice with a sharp paring knife. |
 |
| Cut the peeled slices into 1/2″ cubes. |
 |
| Did you really need this photo? I expect you could have worked out the procedure, but I have it, so there you go. |
 |
| And here’s an arty shot of the squash peelings, or at least as arty as we get around here. I do like the little green lines on the flesh side of the peels. Actually it’s details like that that add a lot to the experience that is life in the kitchen — cooking is an artistic endeavor much of the time if we just pay a little attention. No kidding. |
 |
| Dump the squash cubes into a greased shallow baking dish — about 1 1/2-2 qts. is good for a medium-sized squash. This is a smaller dish for about a half of a squash. I forget what I did with the other half — did I lose it? This much will serve 3 or 4 restrained eaters or 2 squash pigs. Snort, snort… |
 |
| Then you season (arms up!), pour in some heavy cream, and top with shredded cheese. Actually the recipe below is going to tell you to saute a diced onion in a pan and add the squash to that to stir together before putting it all in the baking dish, but I suppose that only proves that you don’t have to follow just one method with many recipes, including this one. When I made this particular gratin pictured above, I left out the onions. Why? I don’t remember — I suppose I didn’t feel like messing with it, or maybe I didn’t have my contacts in and I never cut onions without wearing my contacts. I dunno. Anyway, then you add the cream and cheese, and then you put the sweetie-pie into the oven and cook it until it is bubbling and tender and luscious and a little browned on top, but I forgot to take a picture of mine when it came out of the oven because I sometimes have a short attention span like that, so you’ll have to trust me that it was bubbling and tender and lucscious and a little browned on top, which it was. Of course, how do you know that? It might have burned to a crisp and set the oven on fire for all you know. But it didn’t. Honest. It was amazing. |
Butternut Squash Gratin
Serves 4-6
1 medium butternut squash, peeled and cut into ½” cubes
1 T. butter
1 medium onion, diced
salt and pepper to taste
½ c. heavy cream, or more as desired
½ c. grated Gruyere cheese*
1. Preheat the oven to 350 degrees if finishing the dish immediately.
2. Melt the butter in a large sauté pan over medium high heat; add the onion and sauté a few minutes until tender but not browned. Add the squash and salt and pepper to taste (about ½ t. salt) and stir to combine. Turn into a greased 1 ½ — 2 qt. shallow casserole or gratin dish. Pour cream over the vegetables. One-half cup will produce a fairly dry dish. Add more cream to come nearly to the top level of the vegetables for a richer, saucier result. Top evenly with the cheese. Make ahead: At this point, the dish can be covered with plastic wrap and chilled until ready to bake, up to a few days, I imagine.
3. Bake for about 30 minutes or until the squash is tender when poked with a fork and the cream is bubbly and thickened. Let stand about 10 minutes before serving. The sauce will thicken further on standing.
*You can substitute a mix of buttered bread crumbs and grated Parmesan cheese for the Gruyere if you prefer. If preparing ahead, don’t add the bread crumb mix until just before baking.
Now, get up and go cook something good.
 Follow

3 Comments